 【靈動微】FTHR-G0140開發板移植RT-Thread驅動
#申請原創# #有獎活動#
【目的】移植RT-Thread nano到FTHR-G0140開發板上,并實現任務的創建與運行。
【開發環境】
MDK5.28
【移植步驟】
1、打開一個可以亮燈的基礎例程,這里打開示例的GPIO工程。
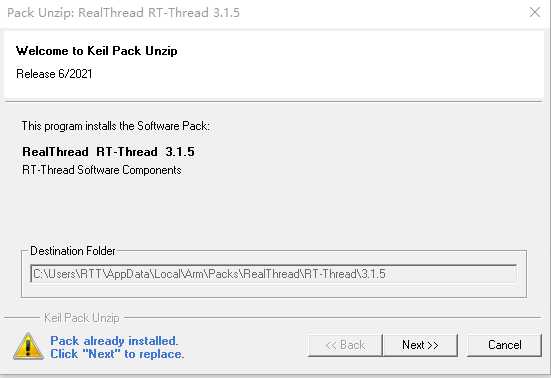
2、Nano Pack 安裝:我們從官網下載安裝文件,RT-Thread Nano 離線安裝包下載,下載結束后雙擊文件進行安裝:
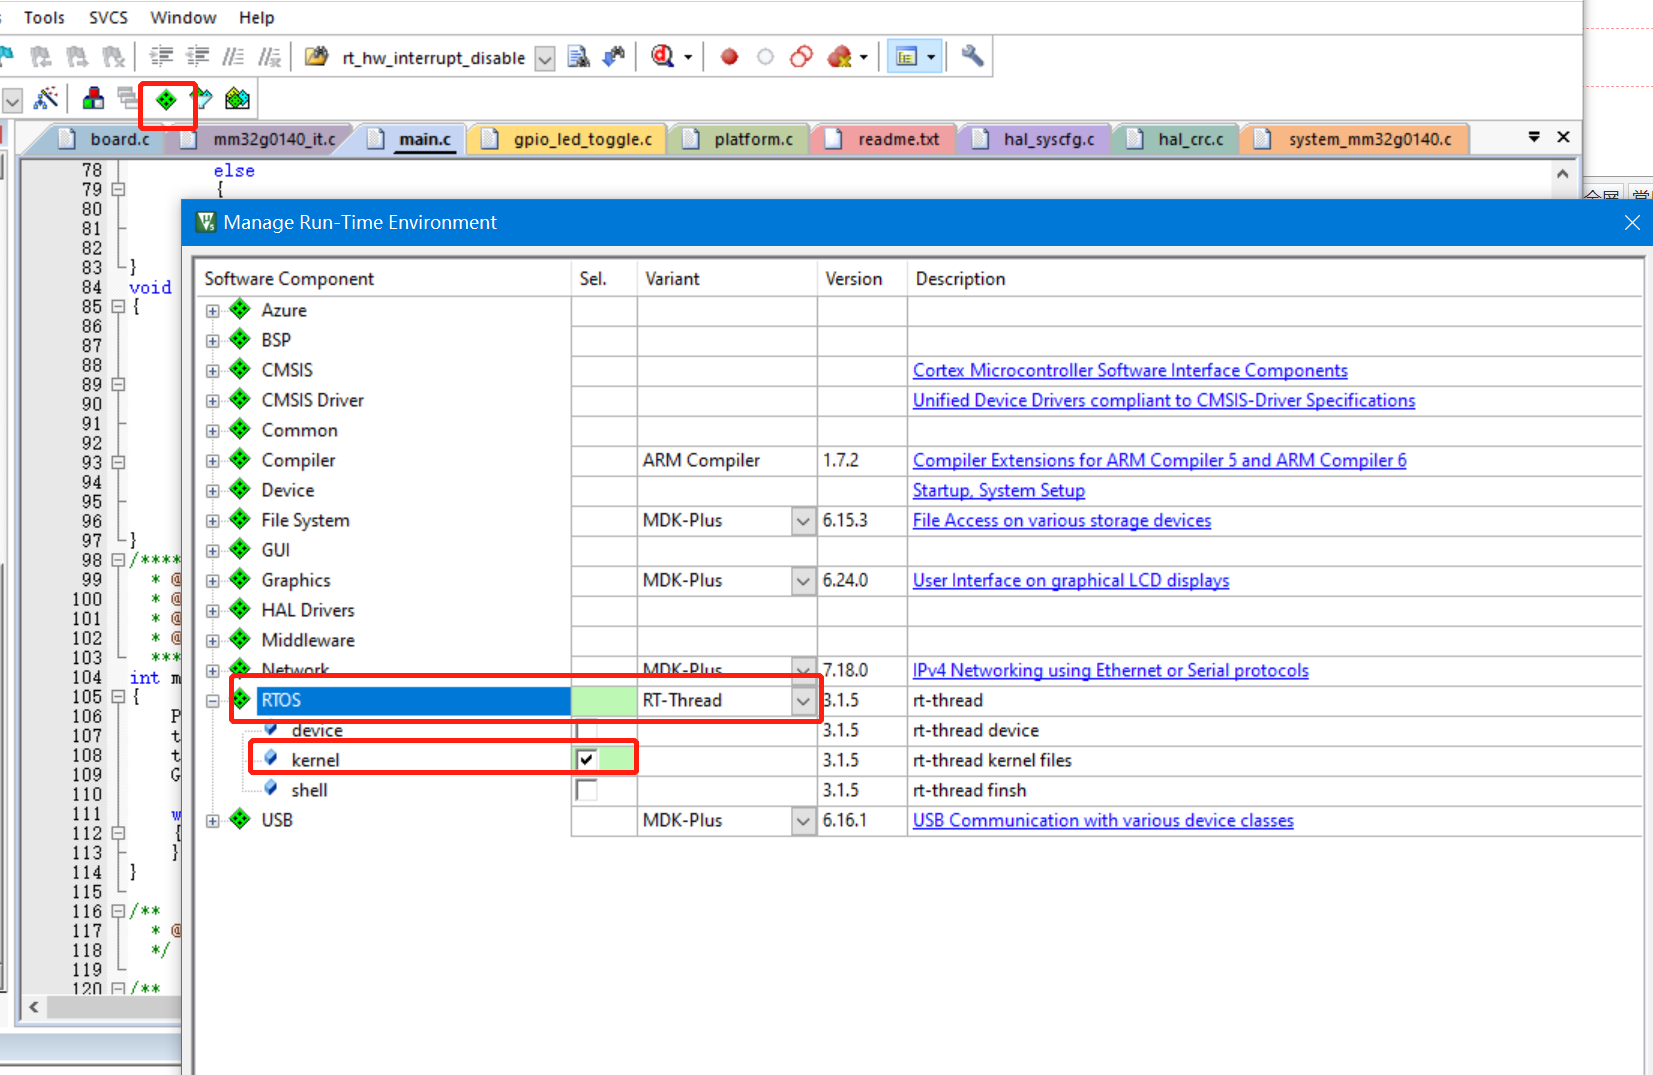
3、添加 RT-Thread Nano 到工程,打開已經準備好的可以運行的裸機程序,將 RT-Thread 添加到工程。如下圖,點擊 Manage Run-Time Environment。
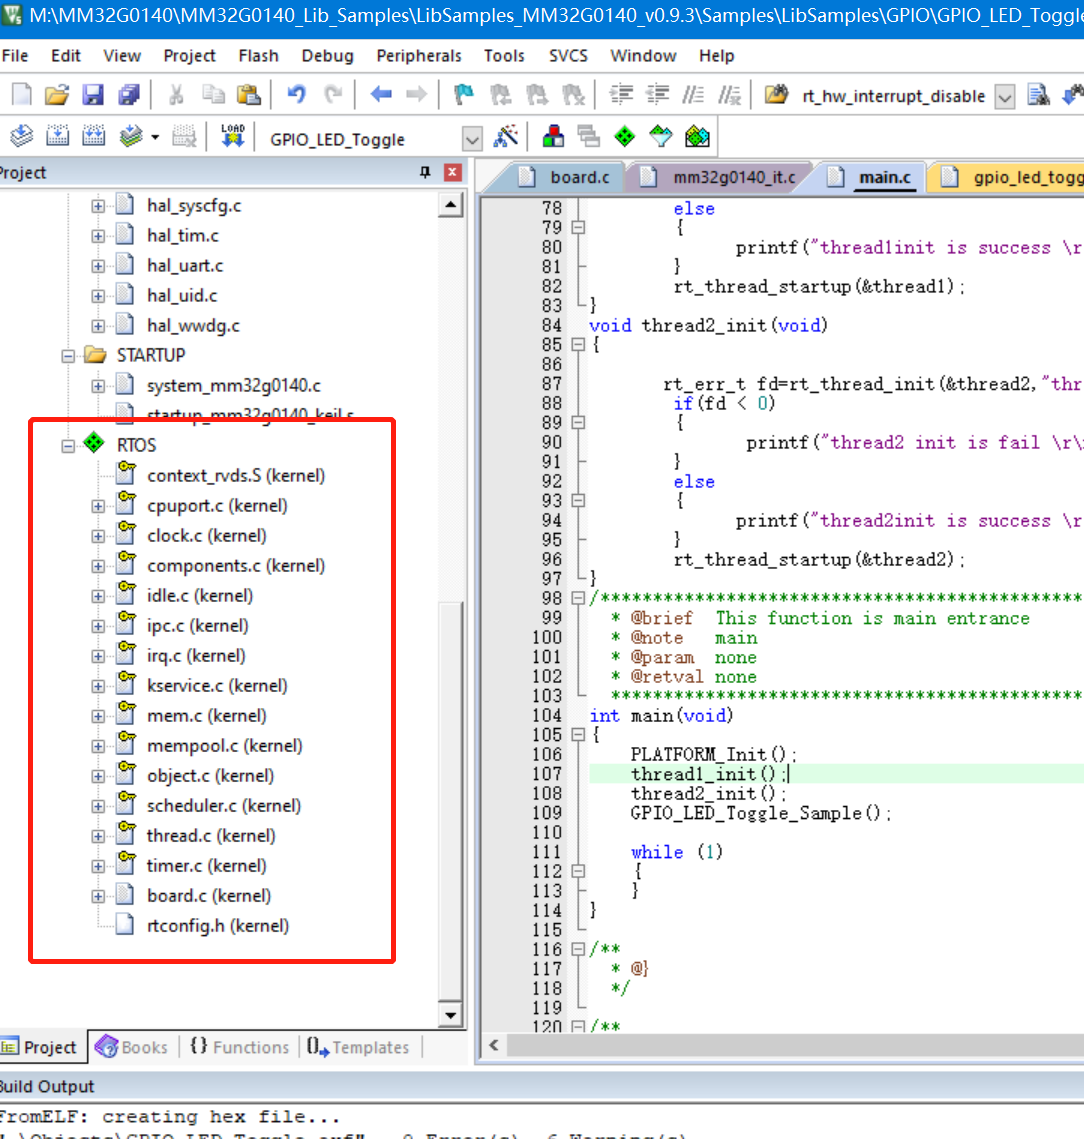
4、現在可以在 Project 看到 RT-Thread RTOS 已經添加進來了,展開 RTOS,可以看到添加到工程的文件:
5、適配 RT-Thread Nano
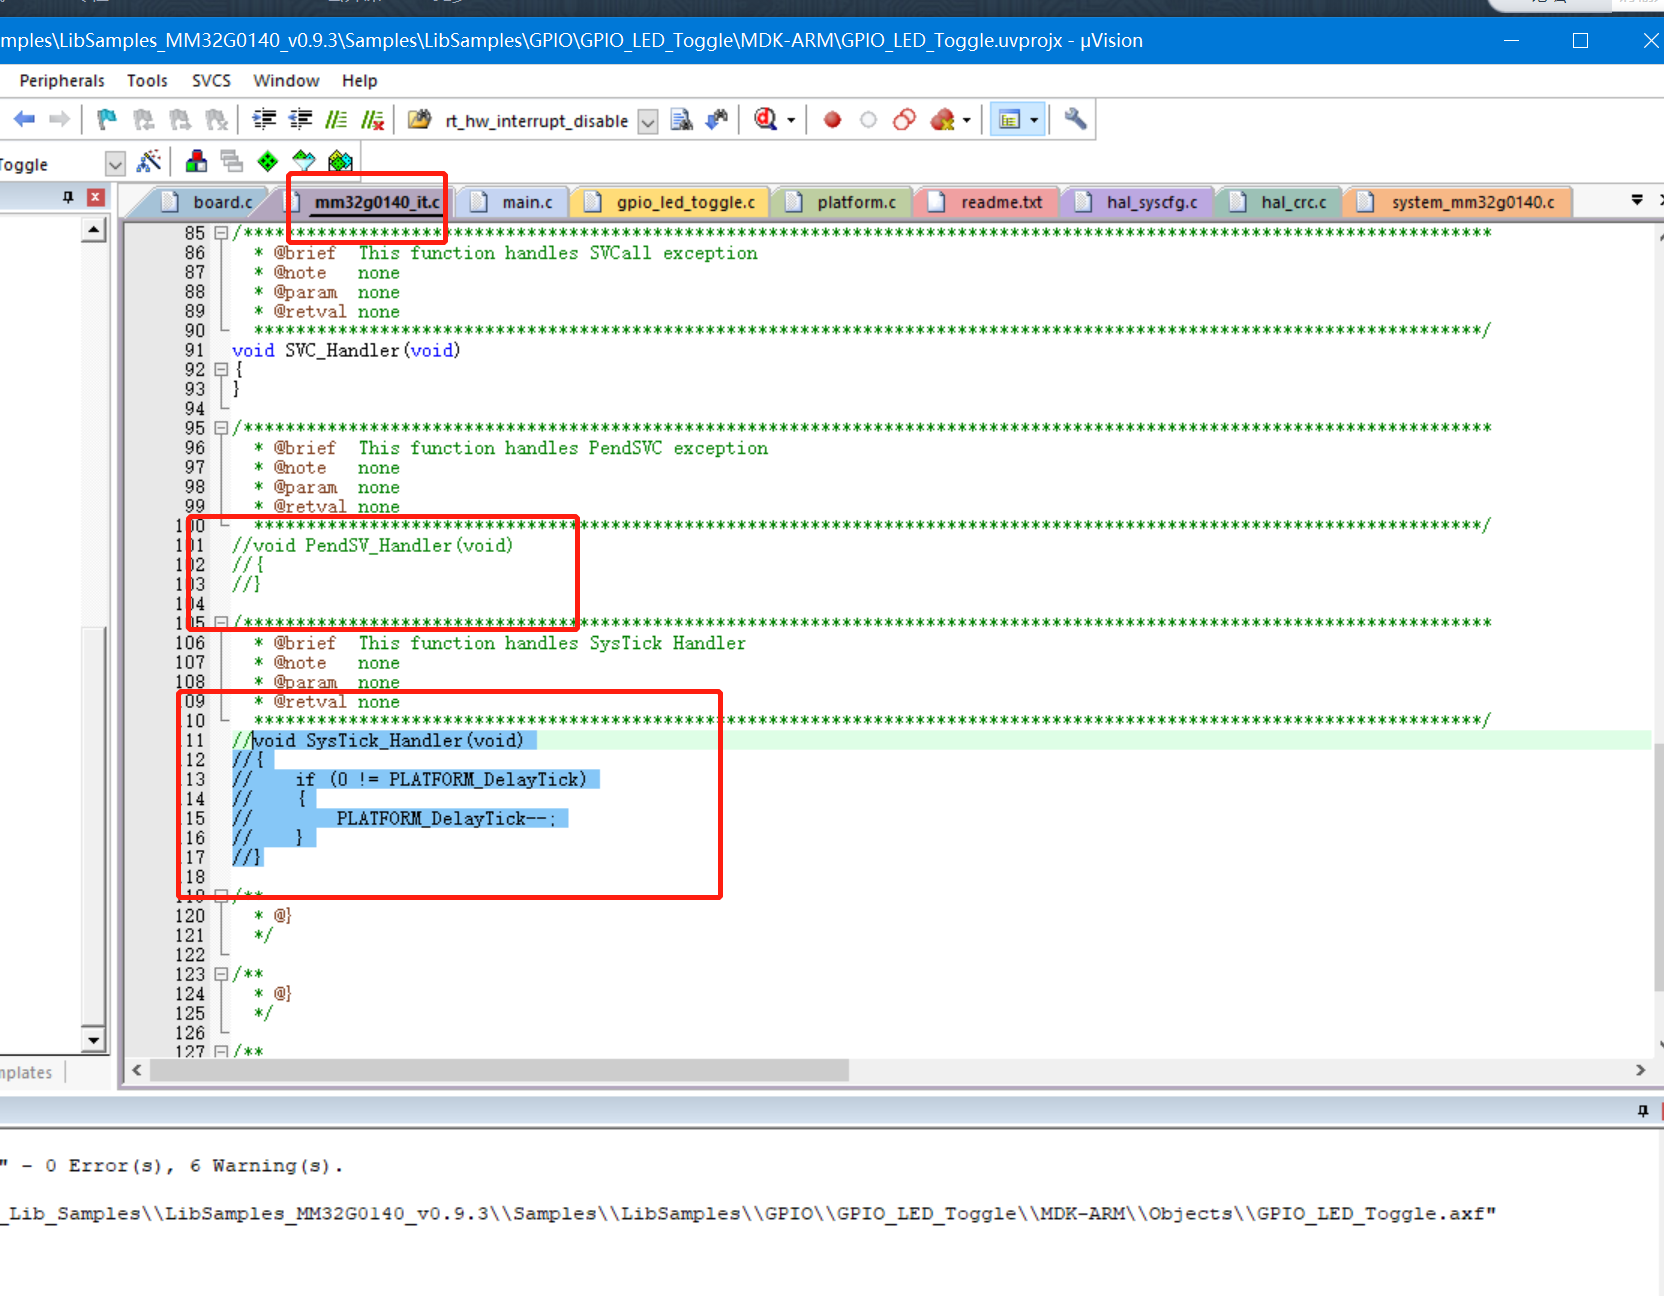
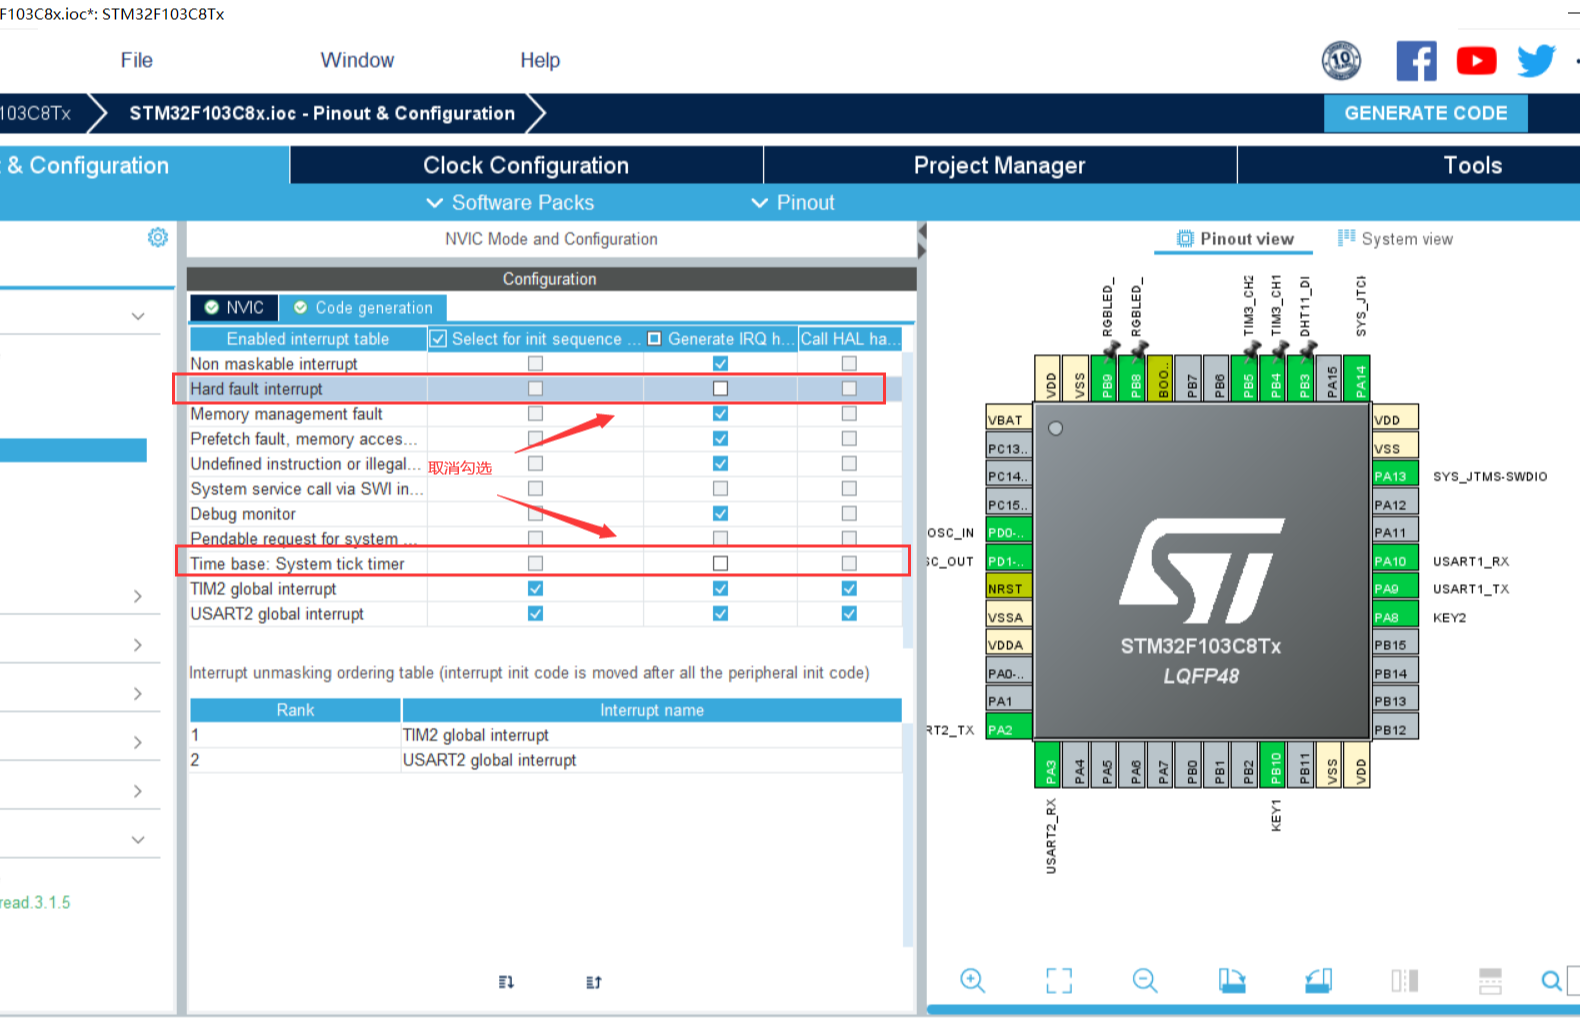
中斷與異常處理
RT-Thread 會接管異常處理函數 HardFault_Handler() 和懸掛處理函數 PendSV_Handler(),這兩個函數已由 RT-Thread 實現,所以需要刪除工程里中斷服務例程文件中的這兩個函數,避免在編譯時產生重復定義。
系統時鐘配置
需要在 board.c 中實現 系統時鐘配置(為 MCU、外設提供工作時鐘)與 os tick 的配置 (為操作系統提供心跳 / 節拍)。
如下代碼所示,用戶需要在 board.c 文件中系統初始化和 OS Tick 的配置,cortex-m0 架構使用 SysTick_Handler()
我們修改函數內容如下:
#define SYSCLK_HSI_XXMHz 72000000
void rt_os_tick_callback(void)
{
rt_interrupt_enter();
rt_tick_increase();
rt_interrupt_leave();
}
void SysTick_Handler(void)
{
rt_os_tick_callback();
}
/**
* This function will initial your board.
*/
void rt_hw_board_init(void)
{
SysTick_Config(SYSCLK_HSI_XXMHz/1000);
/*
* TODO 1: OS Tick Configuration
* Enable the hardware timer and call the rt_os_tick_callback function
* periodically with the frequency RT_TICK_PER_SECOND.
*/
/* Call components board initial (use INIT_BOARD_EXPORT()) */
#ifdef RT_USING_COMPONENTS_INIT
rt_components_board_init();
#endif
#if defined(RT_USING_USER_MAIN) && defined(RT_USING_HEAP)
rt_system_heap_init(rt_heap_begin_get(), rt_heap_end_get());
#endif
}
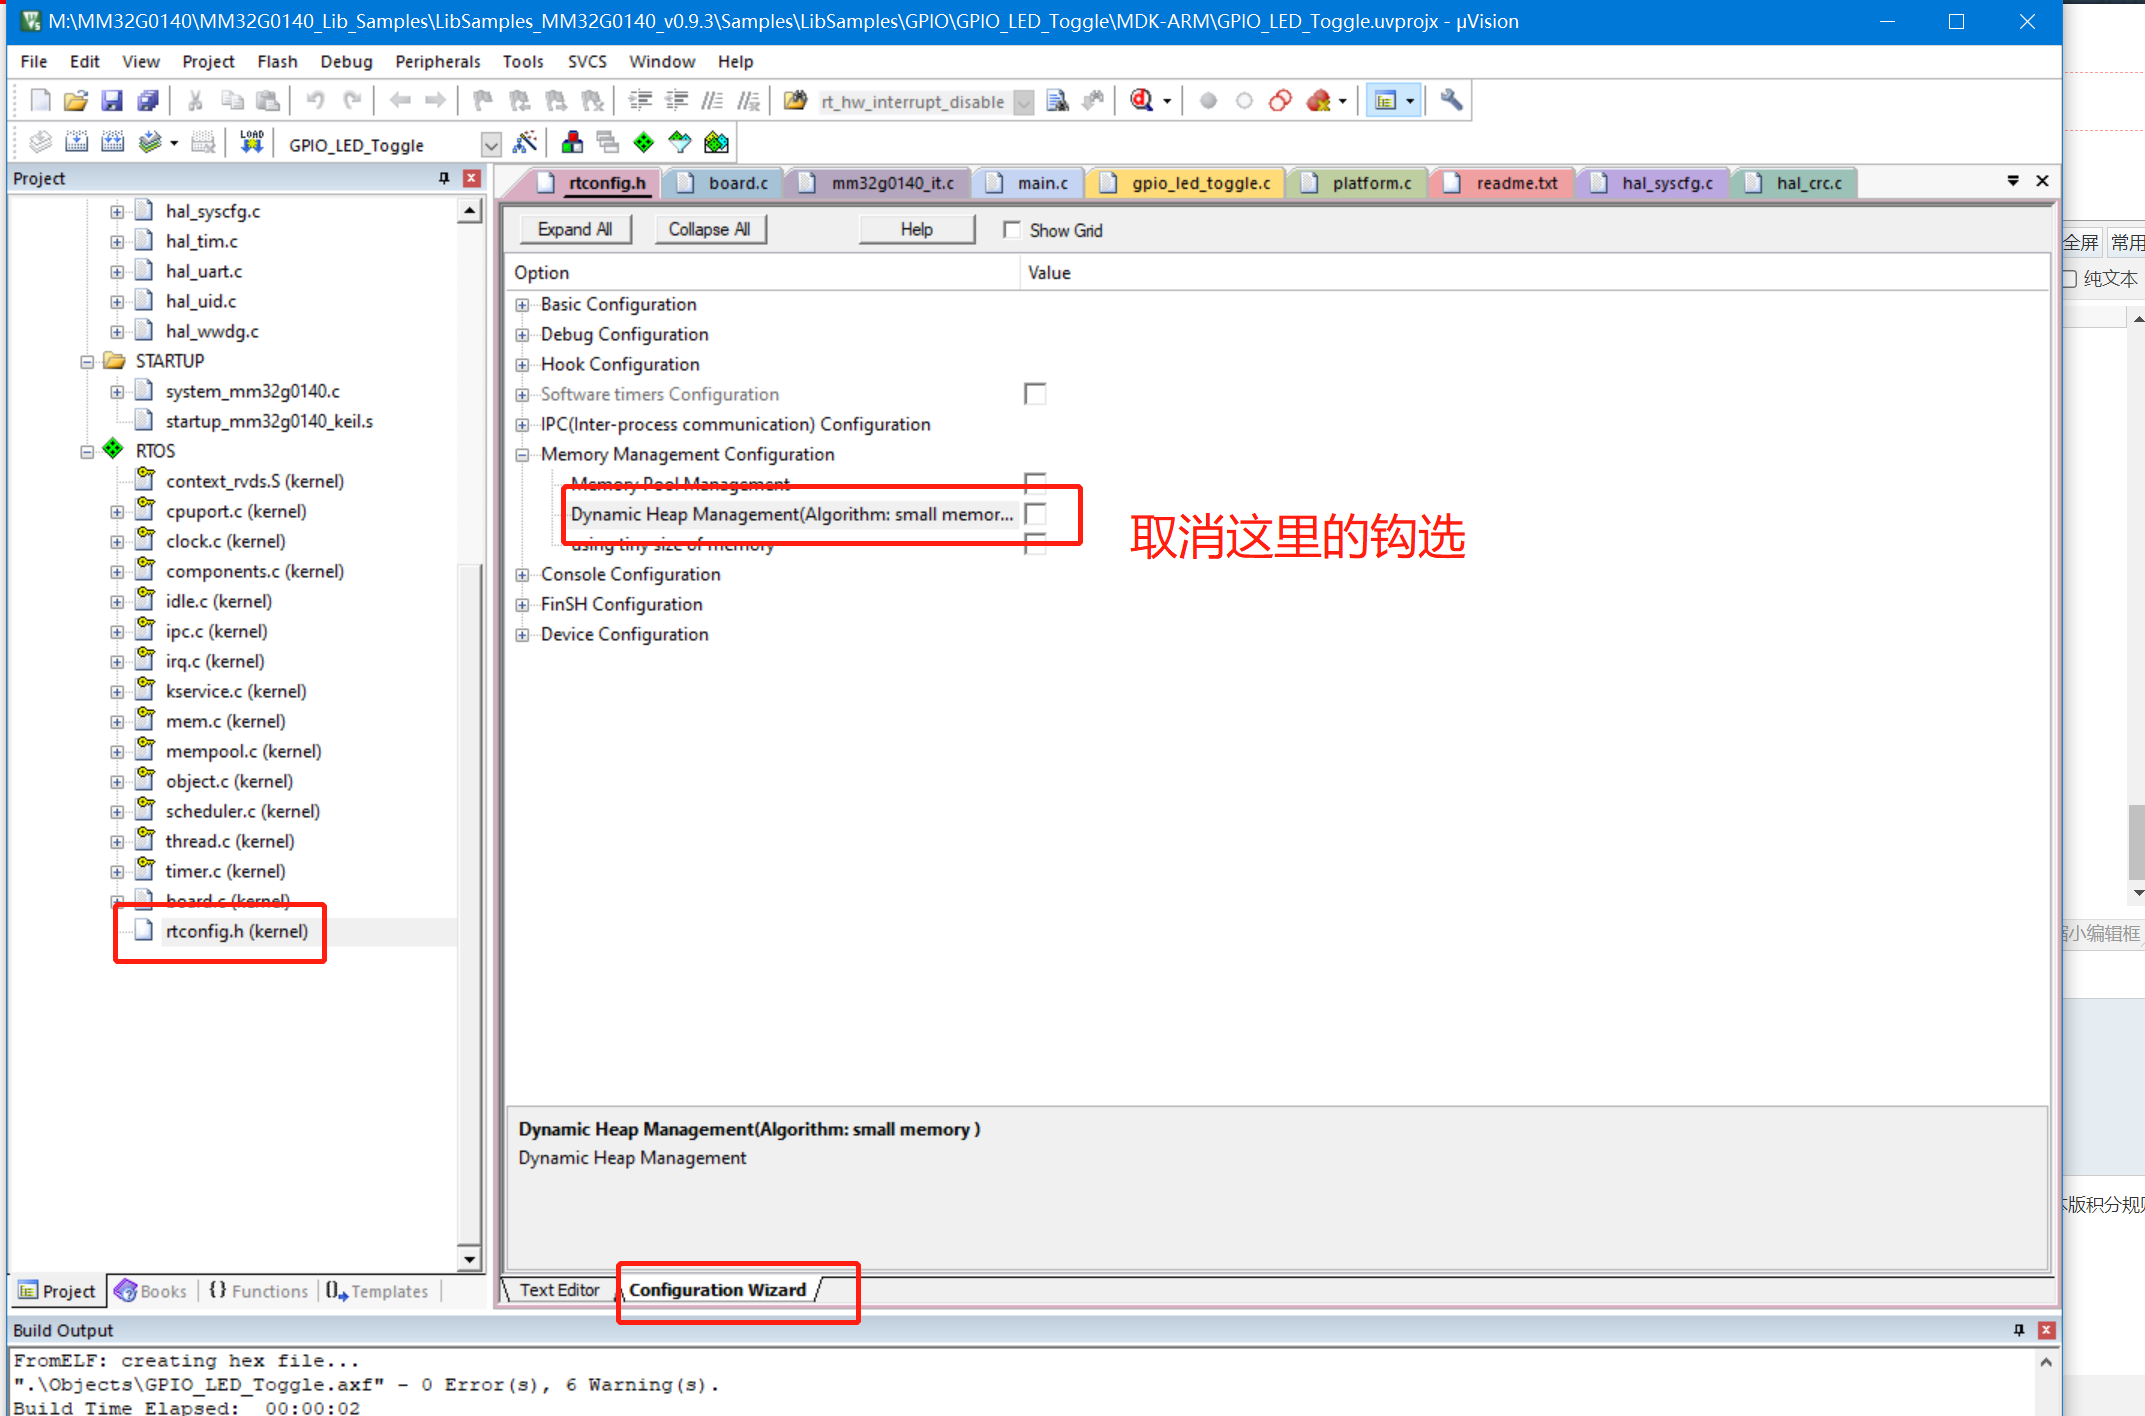
同時我們打開rttconfig.h,在Memory Management Configuation中關閉動態內存池管理
然后我們就可以編譯工程了:
Program Size: Code=6560 RO-data=556 RW-data=148 ZI-data=3172
FromELF: creating hex file...
".ObjectsGPIO_LED_Toggle.axf" - 0 Error(s), 0 Warning(s).
Build Time Elapsed: 00:00:02
6、創建兩個任務,并啟動:
struct rt_thread thread1;
struct rt_thread thread2;
char thread1_stack[512];
char thread2_stack[512];
void thread1_entry(void*param)
{
while (1)
{
printf("thread1 is runningrn");
rt_thread_mdelay(200);
}
}
void thread2_entry(void*param)
{
while (1)
{
printf("thread2is runningrn");
rt_thread_mdelay(400);
}
}
void thread1_init(void)
{
rt_err_t fd=rt_thread_init(&thread1,"thread1",&thread1_entry,0,&thread1_stack[0],sizeof(thread1_stack),10,10);
if(fd < 0)
{
printf("thread1 init is fail rn");
}
else
{
printf("thread1init is success rn");
}
rt_thread_startup(&thread1);
}
void thread2_init(void)
{
rt_err_t fd=rt_thread_init(&thread2,"thread2",&thread2_entry,0,&thread2_stack[0],sizeof(thread2_stack),10,10);
if(fd < 0)
{
printf("thread2 init is fail rn");
}
else
{
printf("thread2init is success rn");
}
rt_thread_startup(&thread2);
}
/***********************************************************************************************************************
* @brief This function is main entrance
* @note main
* @param none
* @retval none
*********************************************************************************************************************/
int main(void)
{
PLATFORM_Init();
thread1_init();
thread2_init();
while (1)
{
}
}
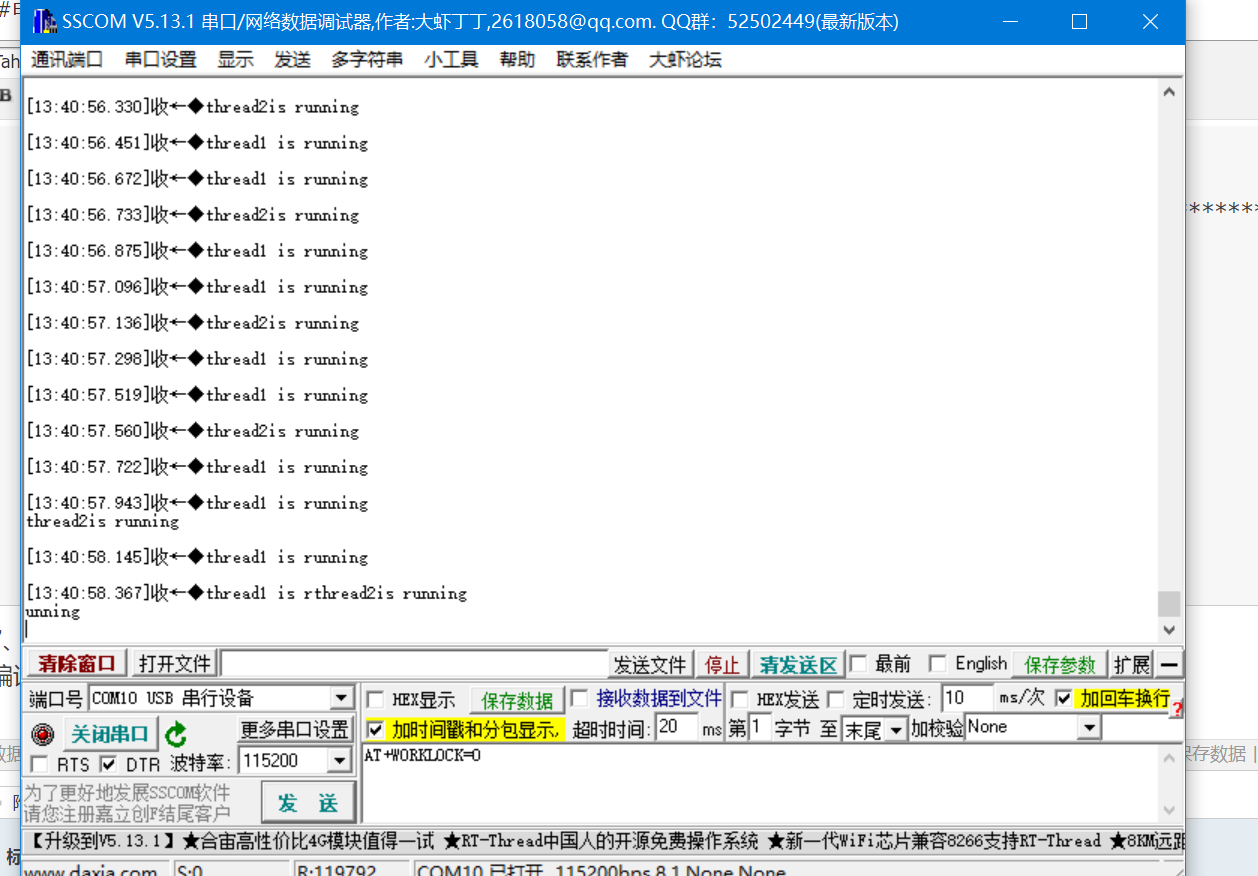
7、實驗效果:
編譯后下載到開發板,我們就可以看到RT-Thread成功啟動了兩個任,打印效果如下:
【總結】作為這款芯片是基于Cortex-M0核,廠家采用了標準的CMSIS結構,使得移植RTT比較成功。
審核編輯黃宇
-
開發板
+關注
關注
25文章
5121瀏覽量
98189 -
RTT
+關注
關注
0文章
65瀏覽量
17217 -
RT-Thread
+關注
關注
31文章
1305瀏覽量
40383 -
靈動微
+關注
關注
4文章
174瀏覽量
22720 -
MM32
+關注
關注
1文章
106瀏覽量
807
發布評論請先 登錄
相關推薦
FTHR-G0140開發板LED點燈
RT-Thread開發,如何有效學習RT-Thread的五個步驟
移植RT-Thread的原理與方法
STM32WB55在RT-Thread系統上移植官方藍牙BLE功能

RT-Thread Studio驅動SD卡
基于RoboMasterC型開發板的RT-Thread使用分享(一)
【項目移植】國民技術N32G4FR開發板:RT-Thread Nano移植FinSH
機智云設備移植RT-Thread
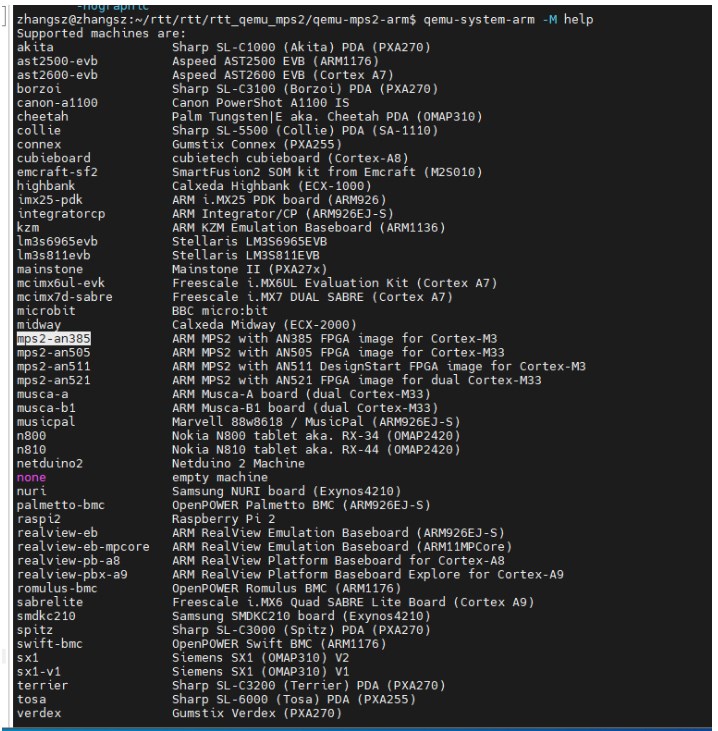
RT-Thread qemu mps2-an385 bsp移植制作 :環境搭建篇
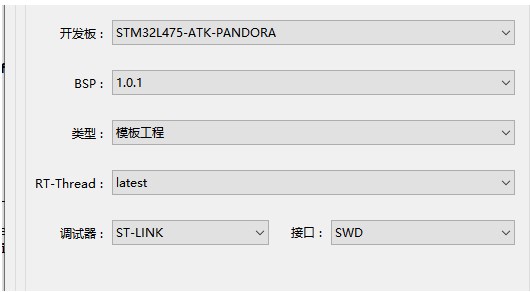
rt-studio潘多拉開發板最新rt-thread不能運行解決辦法
【QEMU系列】不用開發板運行RT-Thread指南-ARM架構


 工商網監
工商網監
評論